Friday, January 18, 2013

Apple Cheddar Cranberry Turkey Meatballs

This recipe combine two of my favorite things - meatballs and Thanksgiving or at least flavors that are reminiscent of Thanksgiving. We are not big fans of ground turkey in this house as it is usually dry and not as flavorful as beef. However Whole Foods carries all dark meat ground turkey and it was great in this recipe. This is one of my husbands favorites although the toddler was not a fan of "raisins" in her meatballs. 2 year olds are tough critics.


Ingredients
  • 1 1/2 pounds ground turkey (I used dark meat)
  • 1 egg
  • 1 teaspoon kosher salt
  • 1 teaspoon black pepper
  • 1 tsp dried or fresh minced onion
  • 1/2 tsp onion powder
  • 1/4 tsp dried thyme
  • 1/4 cup breadcrumbs
  • 1 green apple, shredded
  • 1/2 cup sharp cheddar cheese, shredded
  • 1/2 cup unsweetened dried cranberries
Glaze
  • 3/4 cup apple juice
  • 1 tablespoon soy sauce
  • 1 tablespoon honey
  • 2 cloves garlic, minced
  • 1/8 teaspoon ground ginger
  • dash of crushed red pepper flakes
  • cracked black pepper to taste
  • 2 teaspoons cold water
  • 2 teaspoons corn starch

Directions

Preheat oven to 375 degrees. In a large bowl mix all the meatball ingredients until thoroughly combined. Shape into golf ball sized meatballs and place onto a greased cookie sheet. Cook for 25-30 minutes or until meatballs are browned and cooked through. Toss cooked meatballs in the glaze and serve. 

For the glaze: Mix together cornstarch and cold water until smooth, set aside. Combine remaining ingredients in small sauce pan over medium heat. When glaze starts to bubble whisk in cornstarch slurry and stir rapidly. When glaze is desired consistency remove from heat. Serve over meatballs. 

Monday, January 14, 2013

Peanut Butter Chocolate Chip Bundt Cake

Is there any better flavor combination than peanut butter and chocolate? In this house we tend to think not. When I saw this recipe I knew that it would be a hit with my family and it did not disappoint. The cake is super moist and the chocolate/pb glaze gives it a little extra shot of flavor. 


Peanut Butter Chocolate Chip Bundt Cake


(Slightly Adapted from About.com)

Ingredients:

  • 2-1/4 cups flour
  • 3/4 cup brown sugar
  • 3/4 cup sugar
  • 1 cup peanut butter (I prefer chunky)
  • 1/2 cup butter, softened
  • 1 tsp. baking powder
  • 1/2 tsp. baking soda
  • 1 cup milk
  • 1-1/2 tsp. vanilla
  • 3 eggs
  • 1/2 cup semisweet chocolate chips
Glaze/frosting
  • 1/3 cup peanut butter
  • 1 1/2 cups semisweet chocolate chips

Preparation:

Preheat oven to 350 degrees F. Grease and flour a 12-inch Bundt pan.
In large bowl combine all ingredients except chocolate chips and beat on low speed until combined; then beat three minutes at medium speed. By hand, stir in 1/2 cup chocolate chips. Spoon batter into pan.
Bake at 350 degrees for 55-65 minutes until set, brown, and toothpick inserted in center comes out clean. Cool in pan for 10 minutes, then loosen edges and turn pan onto serving plate. Cool completely, then frost.
To make frosting - In a double boiler melt 1-1/2 cups chocolate chips with 1/3 cup peanut butter, stirring until smooth. Spoon over cake. 

Friday, December 21, 2012

Letters to Rini - 28 Months

Occasionally I will post letters that I have written to my daughter Rini. Usually they are a summary of the current things she is saying and doing and my thoughts about that particular stage of her development.

Dear Rini,

It has been a loooong time since I've done one of these letters. Life has a way of getting busy and Mama forgets to document things. I'll try to do better from now on! 

What can I say about 28 months? It is HARD, man. Really hard. You are very strong willed and very determined to do things your way. You don't have full on tantrums very regularly but when you do it is EPIC. A few weeks ago you had the mother of all tantrums in Walmart, while Mama was alone with you (of course!) You had woken up from a short car nap and you were not happy about it. You screamed pretty much from the time we walked in the store until the time we got home. There was kicking and crying and climbing out of the cart. I had to start laughing before I totally lost my mind and had a breakdown. I'm pretty sure the people in the parking lot thought I was trying to kidnap you. And trying to buckle you in the carseat?  It was like a WWE match. You did not want to sit back and let me strap you in. Let's just say I'm glad these tantrums are pretty few and far between because I might be selling you on the black market if they were an every day occurrence. 

It's not all bad though, not by a long shot. You have a new found love of singing and I know I'm biased but it is pretty much the most adorable thing I have ever heard. You are learning new songs everyday and will come up with your own little toddler rendition. Your favorites are The ABCs, "Twinkle, Twinkle Little Star", "You are My Sunshine" and my personal favorite "Three Little Birds" by Bob Marley. We have been playing reggae for you since before you were born and it looks like the brainwashing has finally worked!

Dora the Explorer has become a full on obsession. You love watching Dora and Boots on all their adventures and have been picking up a ton of Spanish words. You can even count to six in Spanish (and 14 in English!) Pretend play is another one of your new found loves. You love to "cook", have tea parties, take care of your baby and boss your stuffed animals around. 

As always I feel blessed to be able to spend each day with you. Some days are easy and some days are hard but it is always so worth it. It is amazing to me how quickly you have become your own little person with very strong opinions, feelings, likes and dislikes. I look forward to all the days to come. Life with you is never boring, Catarina Maeve. I love you to the moon and back!

Love,

Mama

Wednesday, December 19, 2012

Family Pictures: Fall 2012

It took almost 28 months but we finally had our family pictures taken by a professional photographer. I found Monie of Howson Wright Photography through a friend and she has been so great to work with. To say I am over the moon in love with the end result would be a severe understatment. Monie was able to capture who we are as a family even with our less than cooperative toddler. If you are in the RI/MA area I can not recommend her enough.


I'm so excited to order prints and a canvas or two to display in our house. Now I just need to narrow it down and decided which ones!

Monday, December 17, 2012

Catarina Maeve Turns TWO!

I know it is cliche and all parents say it, but where did the time go? Wasn't it just yesterday that I brought my tiny 6lb 7oz infant home from the hospital? Now she is a full blown, walking, talking little PERSON. Craziness, I tell you, craziness!


For her birthday we decided to go with a Butterfly and Flowers theme since they are both things she likes and it was easy to find items for decor. I did some digging on Etsy and found a gorgeous invitation from Belle Announcements. Liv was great to work with and I'm so happy with the way they turned out!


I wanted to keep things simple with the menu this year so I made almost everything the night before with my awesome sister-in-law. The day of the party we just had to assemble the sandwiches and finish decorating the cake. 

The Menu

Turkey and Italian Sandwiches on Ciabatta Bread
Homemade Potato Salad
Asian Style Coleslaw
Green Chile Cheesecake with Tortilla Chips
A Fruit Platter with Cream Cheese Fruit Dip
Butter Cake with Buttercream Frosting

I also kept the decorations simple. I made a few banners to hang throughout the house and I displayed monthly pictures from Rini's 2nd year in our sunroom. I grabbed some coordinating fabric from the clearance section at Wal-mart and made a runner for the food table and the gift table. A photo from each month of her second year was hung on bandanna banners behind the present table. 

The Food Table 


Yellow Cake with Buttercream Frosting and Chocolate Chips


DIY Bandanna Banners with Monthly Photos hanging above the gift table


Mommy and the Birthday Girl


The Best Family Photo of the day. Toddlers hate pictures!


Opening your presents in a diaper is entirely appropriate at 2


Wednesday, September 19, 2012

I'm a bad Blogger..

I sort of forgot about this blog over the summer. We were busy with outdoor activities, DIY projects around the house, 2 mini vacations and a birthday party for a very special 2 year old. I'm hoping now that the craziness of the summer is behind us I can start posting more regularly!

Saturday, June 9, 2012

Mini Makeover - DIY Firepit

Our backyard is still in a pretty untouched state from when we bought the house. We have a rickety old shed that is a major eyesore and a functional but super ugly chain link fence. We also have a random slab of concrete in one of the back corners of the yard that is about 48" x 50". We have no idea what the concrete was put there for or why. Charlie seems to think it held a Jesus statue or an overgrown souped up birdbath/fountain. I'm still undecided.


See? Super ugly and no form or function. After a brainstorming session we decided it would be the perfect base for a fire pit. At first we were thinking of getting a pre made metal fire pit. We did a little research and quickly realized that most of the options in our price range were ugly, too small or both. A metal fire pit also wouldn't really camouflage the beat up, cracked surface of the concrete. 

We decided to use cement patio blocks to construct the fire pit right on top of the slab. That way we could cover up the majority of the surface area and also customize the shape. A trip to Lowe's and a $120 later we were the proud owners of a trunk full of rocks. The rest of this project was super simple to complete. Charlie laid out the first layer of blocks to figure out how big we wanted the fire pit and then we stacked the top 2 layers. 20 minutes later and it was done. 


We had our first fire on Memorial Day weekend and I am officially obsessed with burning things. Such a quick and easy project with super fun results!

Friday, May 4, 2012

Our House - The Bathroom

Our little 1950's ranch came with a vintage pink and black bathroom, complete with pink wallpaper. We are on a tight budget and a full on bathroom remodel was definitely not happening. We decided to try and make the bathroom looks as good as possible without doing any major changes. Ripping down the wallpaper, painting the walls, removing the shower doors and adding some curtains and artwork have definitely enhanced the space. 

Down the road we plan on re-tiling the floor with a similar vintage style basket weave tile in white and black. We hope to have the tile walls and tub reglazed in white. A new mirror, updated lighting, a storage cabinet over the toilet and a new sink are also on the agenda. 


Here is a shot of the bathroom on the day we closed. We got to work right away removing the wallpaper only to reveal bright pink paint underneath! 


Here is the bathroom as it looks today. I made the curtain from fabric that I found at wal-mart of all places. It was super affordable at about $8/yd. I love that it compliments the pink tile but is also a more modern print. We removed the shower doors and hung a shower curtain that we used in one of our old apartments, it worked out perfectly and was free. In an effort to neutralize the pink as much as possible we painted the walls bright white. Just the addition of the white paint has brightened the space tremendously.


This is a simple DIY print I made to hang next to the vanity mirror. I downloaded some free clip art of a toothbrush and added some text in a nice font. Voila, instant artwork. The mat in the frame was originally white so I painted it with hot pink craft paint to match. I'm a big believer of using what you have on hand! 

Thanks for taking a peek into our bathroom. I will share updates as we continue to make improvements.

Monday, April 30, 2012

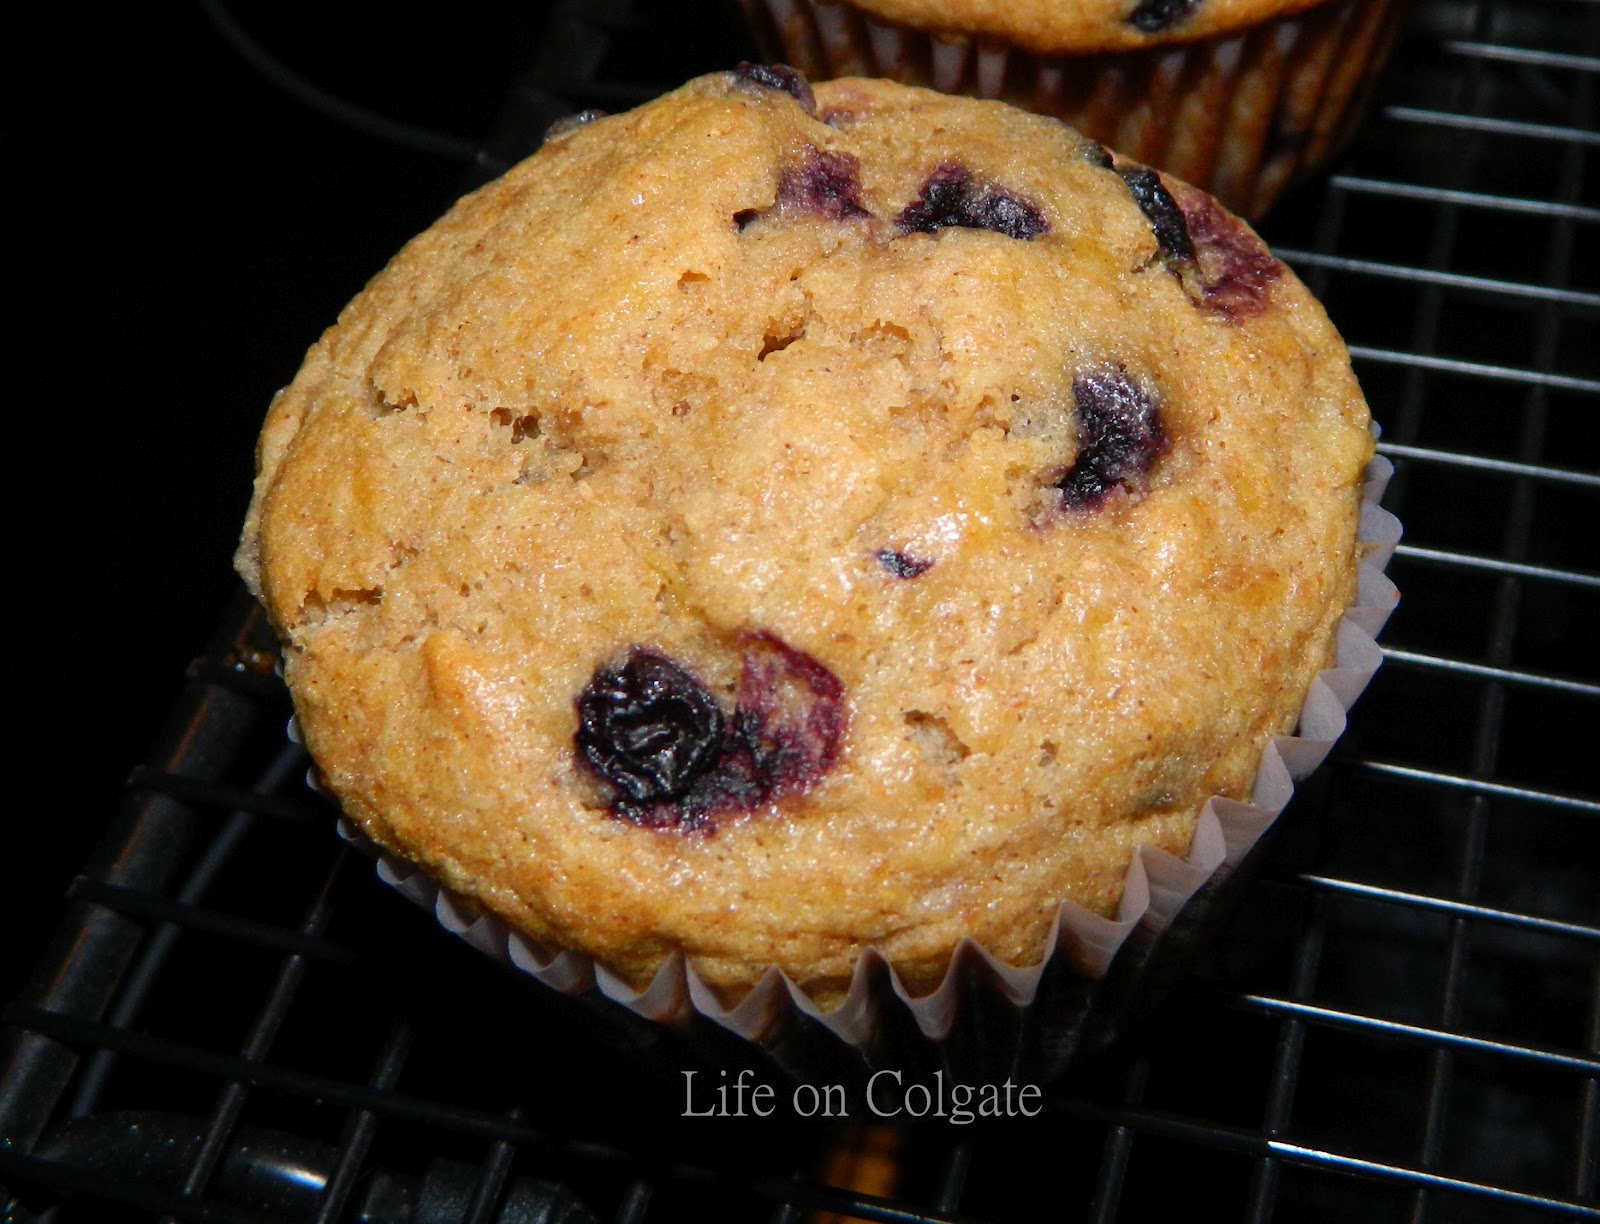
Lemon Banana Blueberry Muffins

Muffins are always a big hit in our house. Rini loves to eat them for breakfast, snacks, lunch or pretty much anytime I will let her. They are an easy grab and go snack for Charlie to take to work. I'm constantly on the hunt for new muffin recipes to try and when I saw this post on Dragon's Kitchen I knew I had to make them. I switched out a few ingredients to make them a little healthier and the end result was delicious!


Lemon Banana Blueberry Muffins
Adapted from Dragon's Kitchen
Yield - 12 large muffins

Ingredients 

  • 1 1/4 cups all purpose (unbleached) flour
  • 1 cup whole wheat flour
  • 2 tsp baking powder
  • 1/2 tsp salt
  • 1/2 tsp ground cinnamon
  • 1 tbsp grated lemon peel
  • 2 large bananas, mashed
  • 2 large eggs
  • 1/3 cup brown sugar, firmly packed
  • 1/3 cup honey
  • 1/2 cup coconut oil
  • 1 tbsp vanilla extract
  • juice of 1 lemon
  • 1 cup blueberries (I used frozen)
Directions

1. Preheat oven to 375 F and place paper liners in muffin tins
2. In a bowl combine flours, baking powder, salt, cinnamon and grated lemon peel. Set aside.
3. Beat together bananas, eggs, brown sugar, honey, coconut oil, vanilla extract and lemon juice until combined.
4. Stir dry ingredients into wet just until combined. Fold in blueberries. 
5. Spoon into prepared muffin cups and bake for 20-25 minutes.


Sunday, April 29, 2012

Our House - The Living Room

In December we bought out first home, a 1950's Ranch in desperate need of TLC. The previous owner was a 90 year old lady who had not updated anything since the 70's. There was dark paneling, wallpaper, harvest gold appliances, nasty carpet and the list of offenses goes on and on. While the interior of our house was far from our "dream house" we love our neighborhood and the location we are in. You can change ugly but you can't change your lot. We are slowly but surely putting our own stamp on the house on a extremely small budget.

Living Room


This picture portrays the 70's-tastic decor that was going on when we first toured the house. Nasty yellow/pea green carpet, dark paneling and brick on the back wall, white washed paneling on the remaining walls, wooden couches with floral upholstery and frilly lacy old lady curains. Pure awesomeness.


This picture was taken on the day we closed. It gives you a better idea of the space we were working with. 


Here is the living room as it looks today. It is still a work in progress but we are getting there. So far we've removed the inoperable wood stove, ripped up the nasty carpet, painted the paneling, painted the brick hearth and started patching the ceiling. 

To Do
  • Finish patching the ceiling and repaint
  • Paint all the trim white
  • New window treatments (roman shades possibly?)
  • Find end tables for the couch
  • Make throw pillows
  • Artwork
  • Get a bigger TV and mount it on the wall
  • Replace front door