Wednesday, January 1, 2014

One Word for 2014

I can't believe another year has come and gone. I feel like 2013 flew by in the blink of an eye. This whole "parent of 2 small children" gig really makes you realize how quickly time passes. I'm not one for grand New Year's resolutions, simply for the fact that I never stick to them. This is what has intrigued me about OneWord365. It's about living intentionally and focusing on the kind of person you want to be not just a singular goal like losing weight or saving money. 

POSITIVE is going to be my word for 2014. I'll admit it - I can be a pessimist. It is hard for me to find the silver lining in my day to day life. So for the next 365 days I want to see things on the bright side, be kinder, happier and more engaged. I want to parent with love and encouragement. I want to believe in the strength of my body and my mind. I want to be a supportive, loving wife. I want to be a positive person. 

2014 the year of Positivity!

Saturday, August 24, 2013

My Favorite Etsy Sellers - Part 1


Etsy is such a great place to find anything and everything unique, handmade, upcycled, creative and fun. I love supporting artists and small businesses. I can (and have) spent hours just going through listings and adding things to my wish list that I didn't even know I wanted or needed.

I've compiled a list of my favorite Etsy sellers. These are all shops that I have personally purchased from and loved their products.

Custom House Portraits by Patty Fleckenstein 

Patty creates amazing pen and ink watercolor portraits of your home. I purchased a gift card for one of her paintings for my in-laws for Christmas and Patty was great about answering questions and sending out the gift card so it made it in time for Christmas. I am so excited to see what the finished product will look like.


Sofie hand crafts amazing one of kind sculptures of creatures and animals out of polymer clay. Her attention to detail is amazing. She created a custom cake topper of 2 ferrets for my best friend's wedding and it was beautiful. The bride loved it! 


How adorable are these Siamese cats? I love that they even have individual little whiskers.


I've been seeing Foxes pop up in home decor, clothing and prints everywhere. This pair would be perfect as a cake topper or displayed in a collection. 


I worked with Liv from Belle announcements to create invitations for Rini's 2nd Birthday Party. She was super helpful and had a quick turnaround time. She has a ton of options for invitations, announcements and more. 
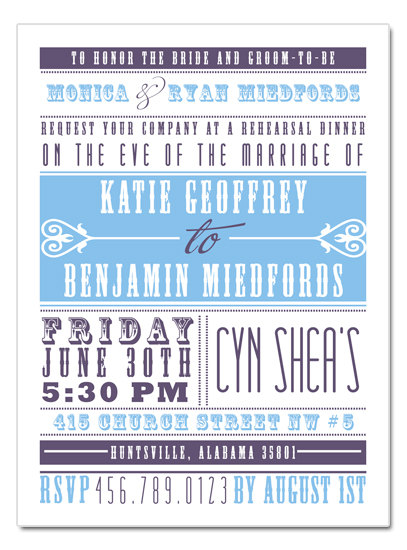
These wedding or rehearsal invitations have a trendy look and are customizable with your wedding colors. 


I love the idea of hosting a football themed gender reveal party! So many possibilities for decor, favors, games, etc. If I was ever to have another baby (which is NOT happening) I would totally do this! 

All opinions are my own. I was not paid to write these reviews, these are just sellers that I have worked with and loved. I hope you do too!


Friday, August 23, 2013

Aislinn Irene

Things have been a little crazy the past few months here on Colgate. We’ve seen a job promotion, potty training, two weddings, a camping trip, multiple house projects, the loss of one of our dogs and most importantly we have a brand new addition to our family.


Introducing Aislinn Irene
Born May 13th at 12:46 pm
7lbs 6oz and 19.75 inches of pure joy
We are all crazy in love especially big sister


Tuesday, March 12, 2013

Banana Coconut Muffins

I make a batch of muffins about once a month. I usually freeze half of the batch so we have some quick grab and go breakfasts in the freezer. These muffins have a delicate coconut banana flavor and they are not overly sweet. The whole wheat flour and coconut oil make them a healthy alternative to sugary cereal or pastries. 


Banana Coconut Muffins
(Adapted from How Sweet Eats)

Ingredients

  • 1 2/3 cup whole wheat pastry flour
  • 1 teaspoon baking soda
  • 1/2 teaspoon salt
  • 1/2 teaspoon cinnamon
  • 2 large eggs
  • 1/4 cup organic cane sugar
  • 1/4 cup honey
  • 1/3 cup canned coconut milk
  • 1/2 cup coconut oil, melted
  • 4 bananas, mashed
  • 1 teaspoon vanilla extract
  • 1 teaspoon coconut extract

Preheat oven to 350 degrees. Spray muffin tins with nonstick spray. In a small bowl combine flour, baking soda, cinnamon and salt. Set aside.

In a large bowl whisk together eggs, sugar and honey until smooth. Add in coconut milk and coconut oil, mixing until combined. Stir in bananas and extracts. Slowly stir in dry ingredients until just combined. Divide batter between muffins tins - the recipe made 12 large muffins for me but will vary depending on the size of your tins. Bake for 20-25 minutes or until toothpick insterted in center comes out clean and the tops are lightly browned. Cool and enjoy!


Monday, March 4, 2013

Whole Wheat Pizza Dough in the Bread Machine

Our family loves to eat pizza. It is such a versatile food that it seems we never run out of combinations for toppings, sauce and cheese. We eat it at least once per week. Having a recipe for a good, easy pizza dough is essential for any home cook. I'm not a big fan of having to knead dough by hand so I use my bread machine to mix this up and it comes out great!


Whole Wheat Pizza Dough in The Bread Machine

Ingredients


  • 3/4 cup warm water
  • 2 1/4 teaspoons of yeast
  • 2 1/4 cups of whole wheat flour
  • 2 tablespoons of vital gluten
  • 1 teaspoon of honey
  • 3/4 teaspoon of salt
  • 3 tablespoons of olive oil
Combine all ingredients in pan of bread machine in order listed by manufacturer - my bread machine calls for wet ingredients followed by dry ingredients with the yeast added last. Run machine on dough cycle. When cycle is complete use dough to make your favorite pizza recipe! 

Wednesday, February 20, 2013

What Rini Wore

I've been trying to take more pictures of Rini, it seems I do well for a few months and then I inevitably slack off and will find that I have only taken a hand full of photos over the course of the month. It really helps that she loves having her picture taken now. She is such a ham and will say "Cheeeese!" over and over for me. It's much nicer than the months of camera hating that we went through starting with her birthday over the summer and ending right after we had our family photos done in November. She would put her hand up and yell "NO pictures" every time the camera was brought out. 


Cardigan - Baby Gap
Dress - Hand me down
Tights - Babies R US
Converse - Kohls


I found these frog rain boots at a local thrift store last week and she has been in love with them ever since. She will even wear them with her pajamas.

Cardigan - The Children's Place
Dress - Old Navy (hand me down)
Boots - Target (thrifted)


Rini loves to play dress up. On this particular day we went through 4 different "princess" dresses over the course of the afternoon. This is her "Cinda-yella" dress.

Dress - Costco (gift)
Arm Warmers - Baby Legs


We attended a Valentine's Day party with our local mom's group last week and I forgot my camera but I did get a quick picture of her with my phone. 

Cardigan - The Children's Place
Shirt, Skirt and Tights - Kohls
Shoes - Payless


Wednesday, February 6, 2013

What Rini Wore


These are a few of the outfits Rini has worn over the last couple weeks. Now that she is a little older (2.5 yesterday!) she has started having more of an opinion on what she wears and what she likes and doesn't like. Her new favorite shoes are her rainboots and she loves anything pink. I love to dress her in cute clothes but I don't like to spend a lot of money. Thrift stores, Ebay, Kohls and Old Navy are our go to stores for her clothes. 


Sweater - The Children's Place
Dress - Hand me down that was dyed black
Tights - Ebay
Boots - Kohls

Rini loves to play dress up and her favorite character is Belle from Beauty and the Beast. She wears this dress at least a few times a month. She is also loving purses and accessories. I gave her a few of my old purses and some bracelets I don't wear anymore and she was in heaven!


Dress - Belle Halloween Costume


Adidas Track Suit - Costco (gift)
Chucks - Converse Outlet


Shirt and tights - Kohls
Skirt - Old Navy (thrifted)
Rain Boots - Baby Gap (thrifted)


Shirt - Wal-Mart
Skirt - Old Navy (thrifted)
Tights - Ebay
Rain Boots - Baby Gap (thrifted)

Monday, January 28, 2013

Homemade Yellow Cupcakes with Chocolate Frosting

I have a big sweet tooth. I LOVE dessert. Cakes, pies, cookies, brownies. You name it, I love it. Combine my love of dessert with being pregnant and you get intense "I NEED IT NOW!" cravings for something sweet. Last week I really wanted a cupcake but it was Monday. The two "good" bakeries near my house are both closed on Mondays so I decided to take matters into my own hands and make cupcakes. These cupcakes were moist and the addition of the homemade chocolate frosting made them rich and decadent. I was a very happy pregnant woman! 


Yellow Cupcakes

Ingredients

2 cups cake flour (I didn't have cake flour so I subbed AP flour and they still came out great)
2 teaspoons baking powder
3/4 teaspoon salt
1/2 cup unsalted butter, softened
1 cup sugar
3 eggs, room temperature
2 teaspoons vanilla
3/4 cup whole milk

Preheat oven to 350 degrees. In a bowl sift together flour, baking powder, and salt. Set aside. Using a mixer cream butter and sugar on high speed until fluffy. Add the eggs, one at a time, mixing well after each one. Add the vanilla and mix to combine. Now alternate adding dry ingredients and milk in three batches, mixing well after each addition. Scrape down the sides of the bowl and mix one final time. Fill paper lined muffin tins 3/4 full with batter. Bake for 20-22 minutes or until cake is done but not brown. Cool before frosting. 

Chocolate Frosting
Adapted from Allrecipes

Ingredients

1/2 cup (1 stick) unsalted butter, softened
1/2 cup unsweetened cocoa powder
1 teaspoon vanilla extract
1/3 cup whole milk
2 1/2 cups confectioners sugar

In a large bowl beat butter and cocoa together until combined. Add milk and vanilla, beat until smooth. Gradually beat in confectioners sugar until desired consistency is reached. Adjust with more milk or confectioners sugar if necessary. Frost cupcakes. 


Sunday, January 27, 2013

Crock Pot Lemon Chicken and Brown Rice Soup

We are admittedly not big soup lovers but when the weather gets frigid like it has been lately a nice bowl of soup is the perfect thing to warm you up. I saw this recipe on Sweet Anna's and I was intrigued by the addition of lemon to chicken soup. My husband loved the flavor of this and has actually requested that I make it again. This is big. He claims to hate soup so I am glad that I have at least one cheap, easy and delicious soup recipe that he enjoys. 


Ingredients:
1 small onion, diced
2 large carrots, chopped
3 cloves garlic, minced
2 cups leftover cooked chicken (or raw boneless breast or thighs!)
8 cups chicken stock
salt & pepper, to taste
1/2 teaspoon dried oregano
1/4-1/2 teaspoon crushed red pepper flakes
2 tablespoons fresh parsley
2 cups cooked brown rice
juice of two large lemons

Directions:
Dump everything but the rice into the slow cooker.  Cook on low for 6 hours or until veggies are tender. To serve place cooked rice in bowl and ladle soup over. Enjoy!

Monday, January 21, 2013

Super Easy French Bread In the Bread Machine

I love my bread machine. I use it multiple times a week. I'm all about saving money and cooking from scratch and my bread machine helps me achieve that quickly and easily. I actually bought mine used at the thrift store for $7 or $8 and it has been going strong for over a year. Most of the time I use it to make dough and then bake the final product in the oven. I like having more control over the cooking process and find my bread comes out fluffier and it rises better vs when I cook it in the bread machine.

This recipe for French Bread is super easy (hence the title) and it is really tasty. Rini and Charlie love eating it hot out of the oven slathered with butter. I like to use it to make French Bread Pizza or sandwiches.


Ingredients 
Recipe from Food.com
  • 1 1/2 cups warm water
  • 4 Cups Bread Flour (I use half unbleached AP flour and half whole wheat)
  • 1 1/2 teaspoons Salt
  • 2 1/2 teaspoons Yeast
Directions

Add Ingredients to the pan in the order listed by the manufacturer of your bread machine (mine calls for wet ingredients first followed by the dry ingredients). Run machine on the dough cycle. Shape dough into 2 long skinny loaves and place on a greased baking sheet. Cut slits in the top of dough and allow to rise, covered, in a warm place for about 30 minutes. Brush the top of each loaf with egg white and bake at 350 degrees for 25-35 minutes (loaf is done when light golden brown) 

Friday, January 18, 2013

Apple Cheddar Cranberry Turkey Meatballs

This recipe combine two of my favorite things - meatballs and Thanksgiving or at least flavors that are reminiscent of Thanksgiving. We are not big fans of ground turkey in this house as it is usually dry and not as flavorful as beef. However Whole Foods carries all dark meat ground turkey and it was great in this recipe. This is one of my husbands favorites although the toddler was not a fan of "raisins" in her meatballs. 2 year olds are tough critics.


Ingredients
  • 1 1/2 pounds ground turkey (I used dark meat)
  • 1 egg
  • 1 teaspoon kosher salt
  • 1 teaspoon black pepper
  • 1 tsp dried or fresh minced onion
  • 1/2 tsp onion powder
  • 1/4 tsp dried thyme
  • 1/4 cup breadcrumbs
  • 1 green apple, shredded
  • 1/2 cup sharp cheddar cheese, shredded
  • 1/2 cup unsweetened dried cranberries
Glaze
  • 3/4 cup apple juice
  • 1 tablespoon soy sauce
  • 1 tablespoon honey
  • 2 cloves garlic, minced
  • 1/8 teaspoon ground ginger
  • dash of crushed red pepper flakes
  • cracked black pepper to taste
  • 2 teaspoons cold water
  • 2 teaspoons corn starch

Directions

Preheat oven to 375 degrees. In a large bowl mix all the meatball ingredients until thoroughly combined. Shape into golf ball sized meatballs and place onto a greased cookie sheet. Cook for 25-30 minutes or until meatballs are browned and cooked through. Toss cooked meatballs in the glaze and serve. 

For the glaze: Mix together cornstarch and cold water until smooth, set aside. Combine remaining ingredients in small sauce pan over medium heat. When glaze starts to bubble whisk in cornstarch slurry and stir rapidly. When glaze is desired consistency remove from heat. Serve over meatballs. 

Monday, January 14, 2013

Peanut Butter Chocolate Chip Bundt Cake

Is there any better flavor combination than peanut butter and chocolate? In this house we tend to think not. When I saw this recipe I knew that it would be a hit with my family and it did not disappoint. The cake is super moist and the chocolate/pb glaze gives it a little extra shot of flavor. 


Peanut Butter Chocolate Chip Bundt Cake


(Slightly Adapted from About.com)

Ingredients:

  • 2-1/4 cups flour
  • 3/4 cup brown sugar
  • 3/4 cup sugar
  • 1 cup peanut butter (I prefer chunky)
  • 1/2 cup butter, softened
  • 1 tsp. baking powder
  • 1/2 tsp. baking soda
  • 1 cup milk
  • 1-1/2 tsp. vanilla
  • 3 eggs
  • 1/2 cup semisweet chocolate chips
Glaze/frosting
  • 1/3 cup peanut butter
  • 1 1/2 cups semisweet chocolate chips

Preparation:

Preheat oven to 350 degrees F. Grease and flour a 12-inch Bundt pan.
In large bowl combine all ingredients except chocolate chips and beat on low speed until combined; then beat three minutes at medium speed. By hand, stir in 1/2 cup chocolate chips. Spoon batter into pan.
Bake at 350 degrees for 55-65 minutes until set, brown, and toothpick inserted in center comes out clean. Cool in pan for 10 minutes, then loosen edges and turn pan onto serving plate. Cool completely, then frost.
To make frosting - In a double boiler melt 1-1/2 cups chocolate chips with 1/3 cup peanut butter, stirring until smooth. Spoon over cake. 

Friday, December 21, 2012

Letters to Rini - 28 Months

Occasionally I will post letters that I have written to my daughter Rini. Usually they are a summary of the current things she is saying and doing and my thoughts about that particular stage of her development.

Dear Rini,

It has been a loooong time since I've done one of these letters. Life has a way of getting busy and Mama forgets to document things. I'll try to do better from now on! 

What can I say about 28 months? It is HARD, man. Really hard. You are very strong willed and very determined to do things your way. You don't have full on tantrums very regularly but when you do it is EPIC. A few weeks ago you had the mother of all tantrums in Walmart, while Mama was alone with you (of course!) You had woken up from a short car nap and you were not happy about it. You screamed pretty much from the time we walked in the store until the time we got home. There was kicking and crying and climbing out of the cart. I had to start laughing before I totally lost my mind and had a breakdown. I'm pretty sure the people in the parking lot thought I was trying to kidnap you. And trying to buckle you in the carseat?  It was like a WWE match. You did not want to sit back and let me strap you in. Let's just say I'm glad these tantrums are pretty few and far between because I might be selling you on the black market if they were an every day occurrence. 

It's not all bad though, not by a long shot. You have a new found love of singing and I know I'm biased but it is pretty much the most adorable thing I have ever heard. You are learning new songs everyday and will come up with your own little toddler rendition. Your favorites are The ABCs, "Twinkle, Twinkle Little Star", "You are My Sunshine" and my personal favorite "Three Little Birds" by Bob Marley. We have been playing reggae for you since before you were born and it looks like the brainwashing has finally worked!

Dora the Explorer has become a full on obsession. You love watching Dora and Boots on all their adventures and have been picking up a ton of Spanish words. You can even count to six in Spanish (and 14 in English!) Pretend play is another one of your new found loves. You love to "cook", have tea parties, take care of your baby and boss your stuffed animals around. 

As always I feel blessed to be able to spend each day with you. Some days are easy and some days are hard but it is always so worth it. It is amazing to me how quickly you have become your own little person with very strong opinions, feelings, likes and dislikes. I look forward to all the days to come. Life with you is never boring, Catarina Maeve. I love you to the moon and back!

Love,

Mama

Wednesday, December 19, 2012

Family Pictures: Fall 2012

It took almost 28 months but we finally had our family pictures taken by a professional photographer. I found Monie of Howson Wright Photography through a friend and she has been so great to work with. To say I am over the moon in love with the end result would be a severe understatment. Monie was able to capture who we are as a family even with our less than cooperative toddler. If you are in the RI/MA area I can not recommend her enough.


I'm so excited to order prints and a canvas or two to display in our house. Now I just need to narrow it down and decided which ones!

Monday, December 17, 2012

Catarina Maeve Turns TWO!

I know it is cliche and all parents say it, but where did the time go? Wasn't it just yesterday that I brought my tiny 6lb 7oz infant home from the hospital? Now she is a full blown, walking, talking little PERSON. Craziness, I tell you, craziness!


For her birthday we decided to go with a Butterfly and Flowers theme since they are both things she likes and it was easy to find items for decor. I did some digging on Etsy and found a gorgeous invitation from Belle Announcements. Liv was great to work with and I'm so happy with the way they turned out!


I wanted to keep things simple with the menu this year so I made almost everything the night before with my awesome sister-in-law. The day of the party we just had to assemble the sandwiches and finish decorating the cake. 

The Menu

Turkey and Italian Sandwiches on Ciabatta Bread
Homemade Potato Salad
Asian Style Coleslaw
Green Chile Cheesecake with Tortilla Chips
A Fruit Platter with Cream Cheese Fruit Dip
Butter Cake with Buttercream Frosting

I also kept the decorations simple. I made a few banners to hang throughout the house and I displayed monthly pictures from Rini's 2nd year in our sunroom. I grabbed some coordinating fabric from the clearance section at Wal-mart and made a runner for the food table and the gift table. A photo from each month of her second year was hung on bandanna banners behind the present table. 

The Food Table 


Yellow Cake with Buttercream Frosting and Chocolate Chips


DIY Bandanna Banners with Monthly Photos hanging above the gift table


Mommy and the Birthday Girl


The Best Family Photo of the day. Toddlers hate pictures!


Opening your presents in a diaper is entirely appropriate at 2


Wednesday, September 19, 2012

I'm a bad Blogger..

I sort of forgot about this blog over the summer. We were busy with outdoor activities, DIY projects around the house, 2 mini vacations and a birthday party for a very special 2 year old. I'm hoping now that the craziness of the summer is behind us I can start posting more regularly!

Saturday, June 9, 2012

Mini Makeover - DIY Firepit

Our backyard is still in a pretty untouched state from when we bought the house. We have a rickety old shed that is a major eyesore and a functional but super ugly chain link fence. We also have a random slab of concrete in one of the back corners of the yard that is about 48" x 50". We have no idea what the concrete was put there for or why. Charlie seems to think it held a Jesus statue or an overgrown souped up birdbath/fountain. I'm still undecided.


See? Super ugly and no form or function. After a brainstorming session we decided it would be the perfect base for a fire pit. At first we were thinking of getting a pre made metal fire pit. We did a little research and quickly realized that most of the options in our price range were ugly, too small or both. A metal fire pit also wouldn't really camouflage the beat up, cracked surface of the concrete. 

We decided to use cement patio blocks to construct the fire pit right on top of the slab. That way we could cover up the majority of the surface area and also customize the shape. A trip to Lowe's and a $120 later we were the proud owners of a trunk full of rocks. The rest of this project was super simple to complete. Charlie laid out the first layer of blocks to figure out how big we wanted the fire pit and then we stacked the top 2 layers. 20 minutes later and it was done. 


We had our first fire on Memorial Day weekend and I am officially obsessed with burning things. Such a quick and easy project with super fun results!